Quick start
For operators. You have a join code and a radio, and somebody else is running the server. This covers the five things you'll actually do: get in, log a contact, change band, cope with a dropped network, and sign off.
If you're the one setting the event up, Getting started covers that end — installing the server, creating the event, and closing it out afterwards.
1. Get in
Open the site, type the join code, and press Join Event.
Then type your own callsign — not the club's. That's the whole sign-in; there are no accounts and no password. Your callsign is what records who worked each contact.
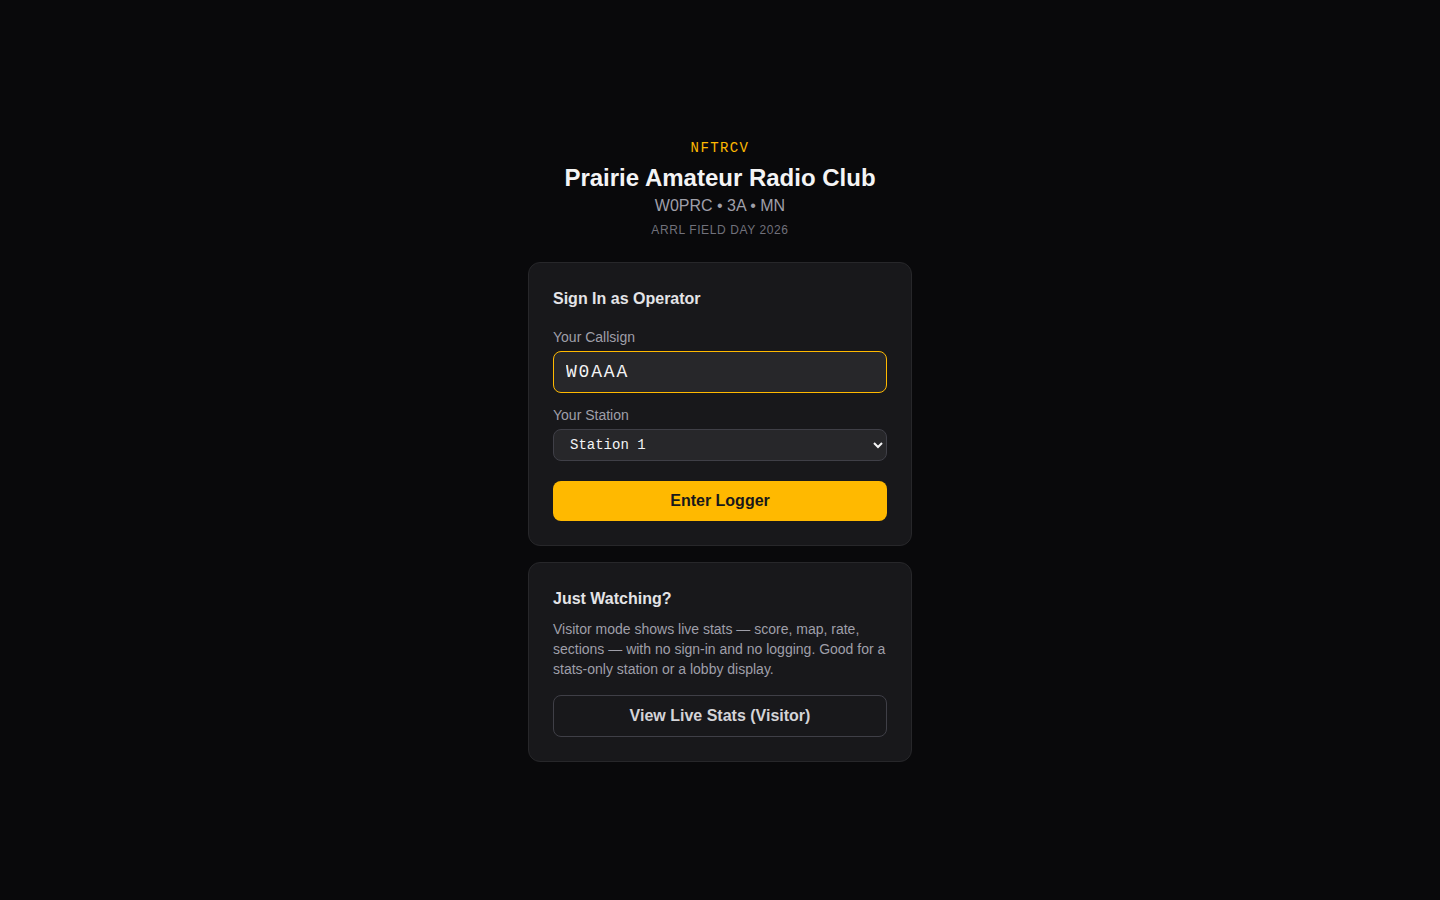
Two things you may also be asked for:
- Which station you're at, on a multi-transmitter Field Day entry (
2Aand up). Pick the radio you're sitting at. It matters: that number becomes the transmitter number when the club submits. - Your grid and state, on a special event. Each operator has their own location, so this can't come from the event.
Pick where you're operating
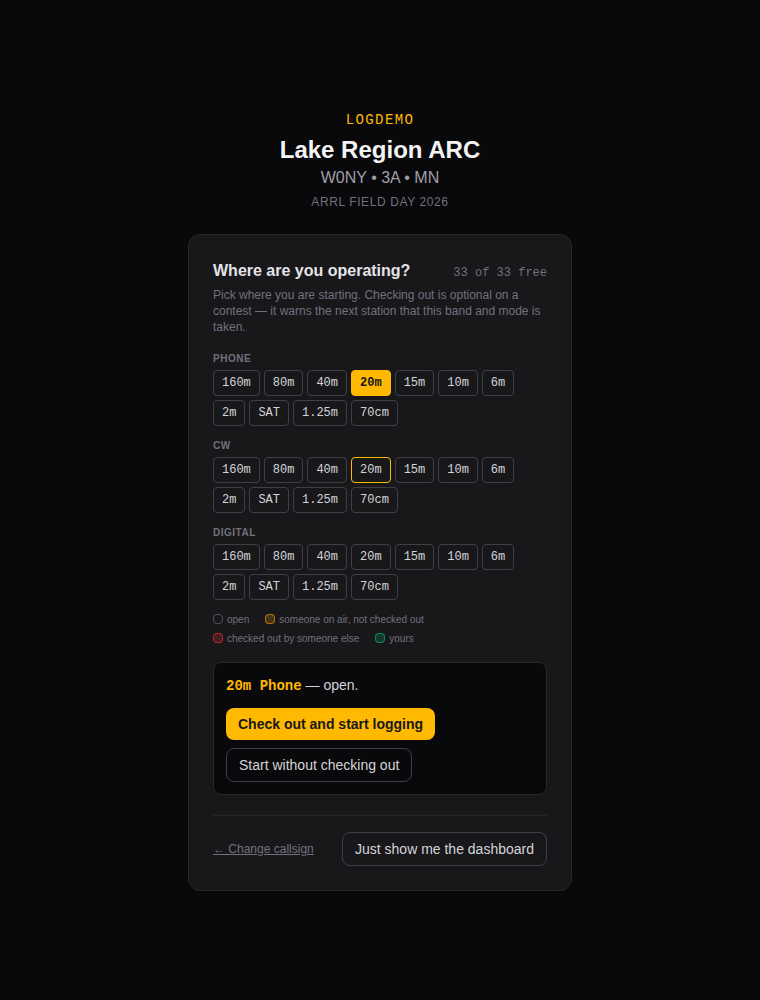
Next you're asked where you're sitting. Bands are laid out by mode and colour-coded:
| Colour | Meaning |
|---|---|
| Plain | Free |
| Amber | Somebody is logging there but hasn't claimed it |
| Red | Somebody has claimed it |
| Green | You have claimed it |
On a special event what is being claimed is the shared callsign, and the screen says check out rather than claim — see Special event stations. Everything below works the same way either way.
One may already be picked for you, with a line underneath saying why:
- You have it claimed. Your booking for this shift, which is the whole reason for claiming in the first place.
- This radio was last on it. Where this browser was logging before — usually the rig in front of you, since a club's laptop stays at its radio while the operators rotate through.
A claim wins where both apply, and a band somebody else holds is never offered this way. Either way it is only a starting guess: click any other band and it changes.
Pick one and you get two buttons. The first — Claim and start logging, or Check out and start logging on a special event — takes the band and mode so nobody else does; the second just tunes the form there without taking it.
On a special event, check out: that's what stops two operators signing the same callsign on one band, and it's the whole point of the screen. On Field Day or Winter Field Day it's optional. Nobody needs permission to use the club call, and the rule being respected is the one about transmitters — one signal per band and mode. A casual club can ignore the claim entirely and rely on the Operators panel in the logger, which reports who is actually on air without anyone having to remember to claim.
If you pick something someone else holds, you can still start there. The log warns on each contact rather than refusing it, because a contact that already happened on the air has to be logged either way.
Just show me the dashboard at the bottom skips logging altogether — for when you came to watch rather than operate.
2. Log a contact
The cursor is already in the callsign box. Type, press Tab or Space between fields, press Enter to log.
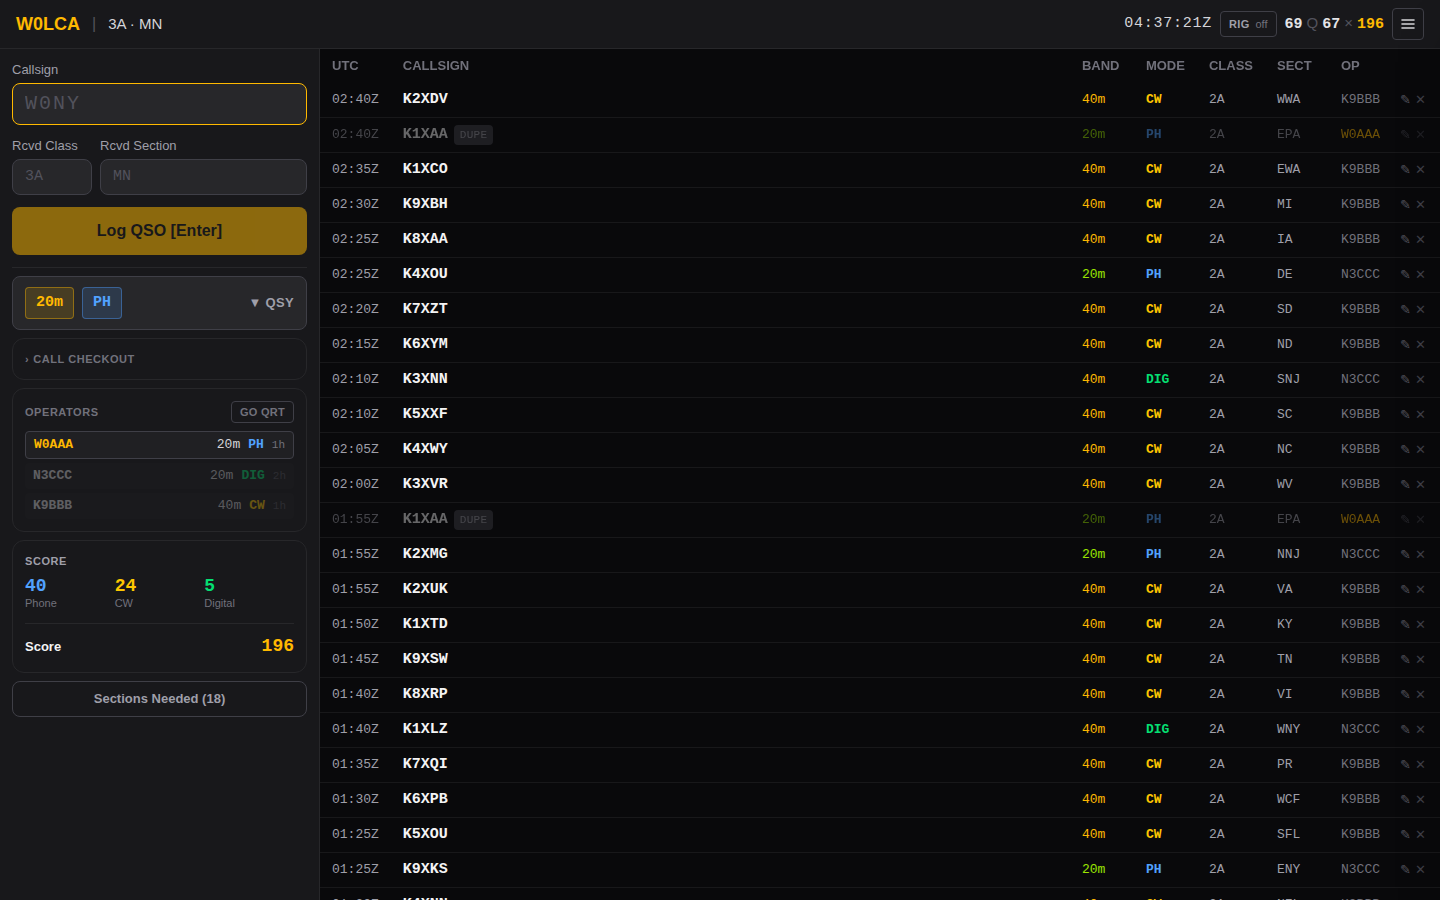
For Field Day that's three things: callsign, class (like 2A), and
section (like MN). The app fills in what it can and tells you what it
can't.
You'll notice as you type:
- A known callsign may prefill the class and section from past events. Check it against what you actually heard — it's a guess, not a log entry.
- A duplicate is flagged before you log it. Dupes still count as logged contacts; they just don't score.
- An unrecognised section gets a warning, and logs anyway. The exchange is stored exactly as you typed it, so a real-but-unusual section is never lost — and a typo is easy to find later.
3. Change band
Press the QSY button, pick a band, pick a mode. If you have rig control running, this follows the radio and you never touch it.
The band buttons show who else is on what. A red row means another operator is already on the band and mode you're about to use.
4. If the network drops
Keep logging. Every contact is written to your own browser before it's sent anywhere, so nothing is lost — not to a flaky link, and not to the server restarting.
A counter appears in the header showing how many contacts are waiting. It clears itself when things recover; you don't have to do anything. If you're impatient, clicking it retries immediately.
The one thing worth knowing: a contact that syncs late is timestamped when the server accepts it, not when you logged it. A long outage shifts those times.
5. Finish up
Go QRT in the operators panel when you step away, so nobody thinks your band is still busy. On a special event, Release your band and mode so someone else can take it.
That's the whole job. Operating covers the same screen in detail — duplicate handling, the band conflict panel, night mode, and why the offline queue behaves the way it does.
When something looks wrong
| What you see | What it means |
|---|---|
OFFLINE in the header |
Your browser has lost its network. Keep logging. |
3 pending ↑ |
Contacts waiting to sync. It clears on its own. |
| A red operator row | Someone else is on your band and mode. |
Queued — syncing… on a contact |
It's saved locally, on its way to the server. |
| A clock warning banner | The server's clock disagrees with yours — tell whoever runs it. |
Anything stranger is in Troubleshooting.